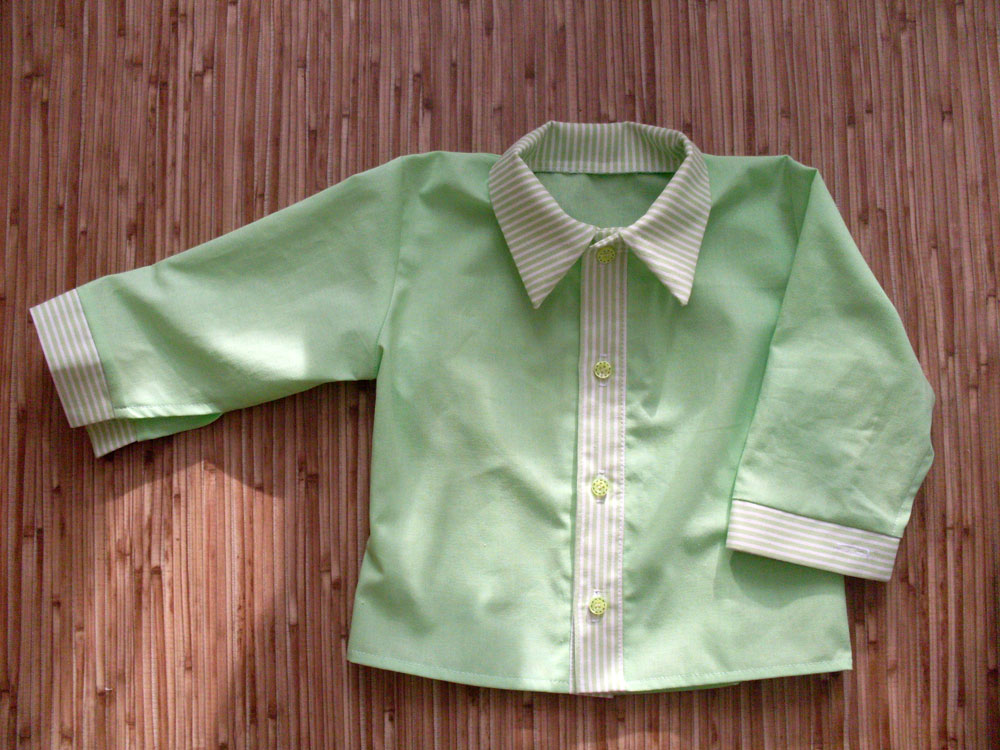
To sew a classic shirt for boy we will need:
– 2 types of shirt fabric – single-colored for the basis and a narrow stripped companion for the decoration;
– adhesive interlayer for shirts (tough) to put in the collar, plackets and cuffs;
– 6 pcs of plastic buttons for the fastening and cuffs;
– sewing threads;
– scissors;
– a special chalk for cutting out;
– a household sewing machine;
– an overedging machine (overlocker);
– an iron with steam function.
Sewing pattern boy’s shirt
A shirt pattern for a 12 month boy is given in full size for printing on a home printer on four A4 sheets. You can also adapt the pattern, redraw from the screen of the monitor, increasing the size.

Tutorial. How to sew a boy shirt:
First of all, you need to cut out all the shirt details. To do this, iron the shirt fabric out carefully, using steam, allow it to cool down. Then, fold it in half, outline the details, making 1 cm seam allowances and cut out.

After that, you can get down to preparing the details.
Cut out the placket detail, making length allowance. Glue it, iron in half along the length, put face to face with the forepart and sew down.
- The placket seam allowance should be ironed out towards the placket itself. The second horizontal shear of the placket should be overlocked. After that, the placket can be turned off towards the placket underside as it will be when ready.
You need to sew together the shoulder seams of the garment, overlock and iron them out towards the back.
Then, in order to avoid stretching of the gorge cut while making the shirt, it should be handled with the collar. - Cut out the whole collar detail, taking into consideration that the upper collar will be slightly wider between the shoulder seams, where it will be seamed into the back gorge. It is necessary to provide for it, in order to avoid the ready collar being tied up after bending, due to the lack of width.
Duplicate the collar detail and iron it out in half. - Stitch around the ends of the collar. Carve the corners, turn out and iron the collar.
Seam the prepared collar into the shirt gorge. While seaming, keep in mind that the collar should end strictly in the middle of the placket and not further, otherwise, when the shirt is buttoned, the ends may superimpose on one another, which is unacceptable.
Overlock the seaming stitch of the collar. Turn out and straighten the plackets’ ledges. - Prepare the cuffs the same way as the collar – duplicate them, iron out in half, stitch around the ends, turn out, iron out.
Overlock front and elbow cuts of the sleeves. Seam down the cuffs at the bottom of the sleeves, covering them at the beginning and the end with the sleeve allowances.
Overlock the cuffs’ seaming stitch.

After that, seam the sleeves into the opened armholes, overlock the sleeve head seam and iron it out towards the sleeve. By this time, the placket’s and the back’s side edges should have been overlocked.
Then, you need to sew together the side seams of the shirt and the sleeves’ bottom seams at the same time. While seaming the sleeves, do not make the stitch to the end – leave a cut for making cuffs’ buttoning more convenient.
- Iron out the seam allowances.
Turn the cuffs out to the front side, iron their seaming stitch out onto the sleeve. Stitch the sleeves’ cuts.
Then you need to shape the bottom part of the shirt. Further, you are to stitch up the plackets’ bottom corners and overlock the shirt’s bottom cut. Then, turn the plackets’ corners out to the front side, iron them out, together with ironing out the allowance for felling the shirt’s bottom part at the same time.
You should fell the shirt’s bottom concurrent with stitching the finishing line along the plackets.
When the shirt is ready, sew button-holes and sew down the buttons. The garment should be completely and carefully ironed.

Now, you know, how to sew a boy shirt. Also, see how to sew a baby romper, a jacket for a girl and a ruffle diaper cover. Good luck.